Overview
This documentation covers setting up and configuring Eensy. It is recommended to read through this and even follow along if you are considering setting up an Eensy device.
Hardware
- Single board computer supported by Eensy. See Downloads for supported boards.
- 1GB or larger uSD or SD card applicable to your SBC.
- Ethernet cable.
- Power supply and cable.
- Optional case for your SBC. For example, I like this case for the Raspberry Pi Mode B 2 and 3.
- Optional TTY to USB Serial Converter for debugging.
- Optional external hard drive or USB stick for repository and user data storage. This is recommended for long term data storage.
Features
- Minimal install optimized to run on an embedded Linux boards.
- Default install and configuration of Gogs.
- Automatic configuration of MySQL server.
- Automatically mounts external media for repository and user data storage.
Create a uSD/SD Card
The first thing to do is create a uSD/SD card. Testing is done with SanDisk Ultra cards. Installation consists of extracting and writing the downloadable image to your uSD/SD card.
Windows
- Use 7-zip to extract the img file.
- Insert the uSD card into your uSD card reader and check which drive letter was assigned. Look at the left column of Windows Explorer.
- Download the Win32DiskImager utility and extract it (it's a zip file).
- Run the Win32DiskImager utility. You may need to run the utility as administrator. Right-click on the file, and select Run as administrator.
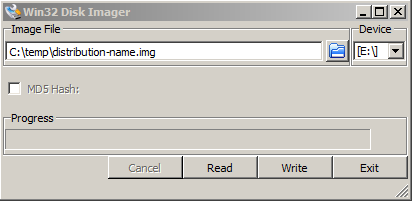
- Select the eensy-XXX-YYY.img.xz file you extracted.
- Select the drive letter of the SD card in the device box.
- Click Write and wait for the operation to complete.
- Exit the imager and eject the uSD card.
Linux
Insert your uSD/SD card and figure out what the device node is and replace /dev/sdX with it.
Simply extract and dd the image to your uSD/SD card in one pass.
unxz -c eensy-XXX-YYY.img.xz | sudo dd of=/dev/sdX bs=1M; sync
Initial Setup
Once you've got your uSD/SD card created, now it's time to setup the device before applying power. This gets a bit board specific, but it Eensy makes this generally the same for all boards where possible.
The root user does not support login by default. However, you can setup shared SSH keys to automatically login as root. Instead, the git user can login and use sudo to run things requiring root access. The default credentials are user git and password eensy that can be used to SSH into the device or to login through the serial console.
Add External USB Media for Repositories and User Data
External USB sticks or USB hard drives are supported on all SBCs. When attached, they are automatically mounted at /media/usbX where X is the number of attached USB devices. If you have one, go ahead and attach it. It's generally not considered good practice to constantly write to removable flash media over a long period of time. It will eventually wear out. If you're concerned about this, pick up an external USB hard drive enclosure. It is recommended to format the USB drive as an ext3/ext4 filesystem.
Serial Console
It's not absolutely required to setup the serial console if you have a method to determine the IP address of your board or your DHCP server supports registering hostnames, in which case, Eensy will register with the hostname "gitsrv."
With that said, a serial console can be very useful for initial setup and debugging. After that, you can use SSH to login to Eensy with the git user. To access the serial console on a PC, you'll need a TTY to Serial USB cable. The default serial baud rate for all boards is 115200. You can use something like the JBtek Debug Cable to accomplish this.
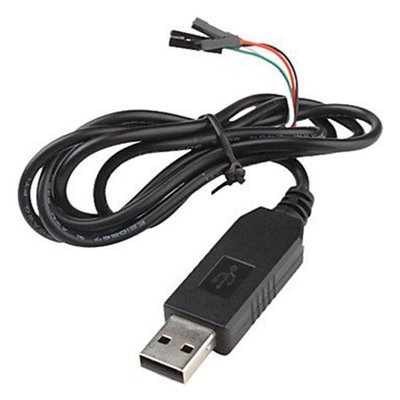
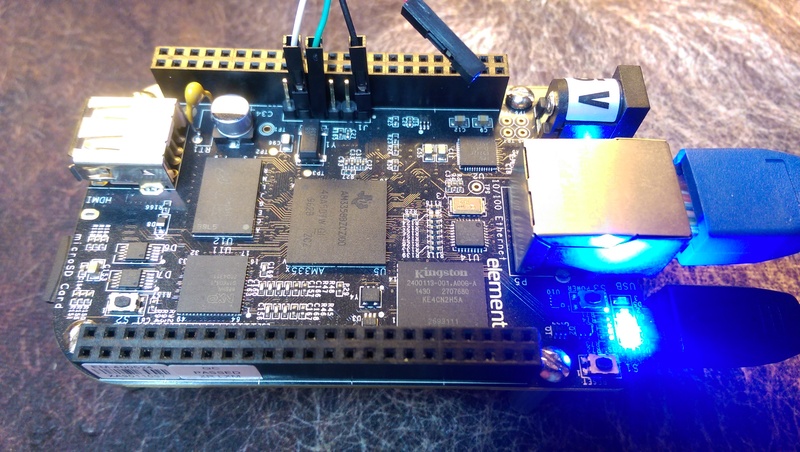
| Black | Ground |
| Green | Tx |
| White | Rx |
| Red | 5V (unused) |
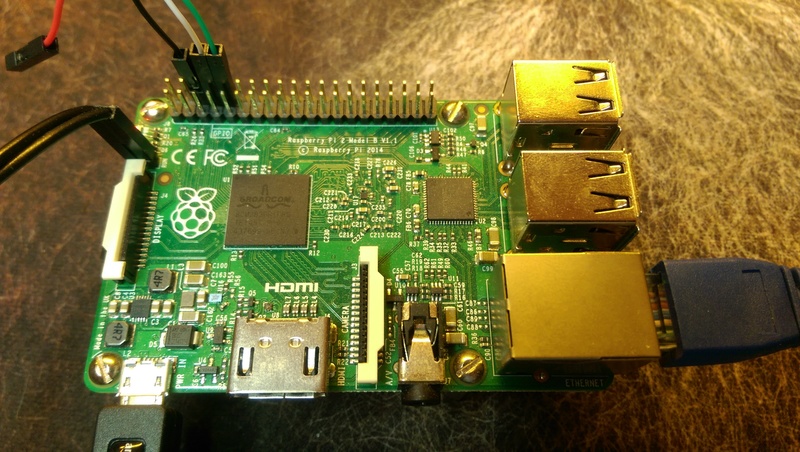
Remember, where your board pinout says Rx, that means you want to connect the Tx of your serial cable to it. You can see the actual pinout in the pictures below using the JBTek wire colors.
Raspberry Pi 2/3
Setup for the Raspberry Pi 2 and 3 are identical. Insert the uSD card, connect an Ethernet cable, optional USB storage, and optional serial console. Then, apply power. It takes a fair amount of time to initialize the uSD filesystem and expand it to the size of your card. The device will reboot automatically at least once. Just be patient until you can ping gitsrv or the IP address of your SBC. Don't cycle power while the uSD/SD card is initializing or you'll corrupt it and have to start over.
CubieBoard 2
Insert the uSD card, connect an Ethernet cable, optional USB storage, and optional serial console. Then, apply power. It takes a fair amount of time to initialize the uSD filesystem and expand it to the size of your card. The device will reboot automatically at least once. Just be patient until you can ping gitsrv or the IP address of your SBC. Don't cycle power while the uSD/SD card is initializing or you'll corrupt it and have to start over.

BeagleBone Black
Insert the uSD card, connect an Ethernet cable, optional USB storage, and optional serial console. Hold down the boot button (S2), and apply power. Hold the button down for a couple seconds after applying power. You only need to hold the button down once, every time after that it will automatically boot from the uSD card. It takes a fair amount of time to initialize the uSD filesystem and expand it to the size of your card. The device will reboot automatically at least once. Just be patient until you can ping gitsrv or the IP address of your SBC. Don't cycle power while the uSD/SD card is initializing or you'll corrupt it and have to start over.
Configuring Gogs
Once the SBC has booted and it's done automatically setting things up, direct a web browser on the same network to http://gitsrv or use the IP address of your SBC as necessary. If everything went well, you should get the Gogs install page.
You should be able to leave all settings as default.
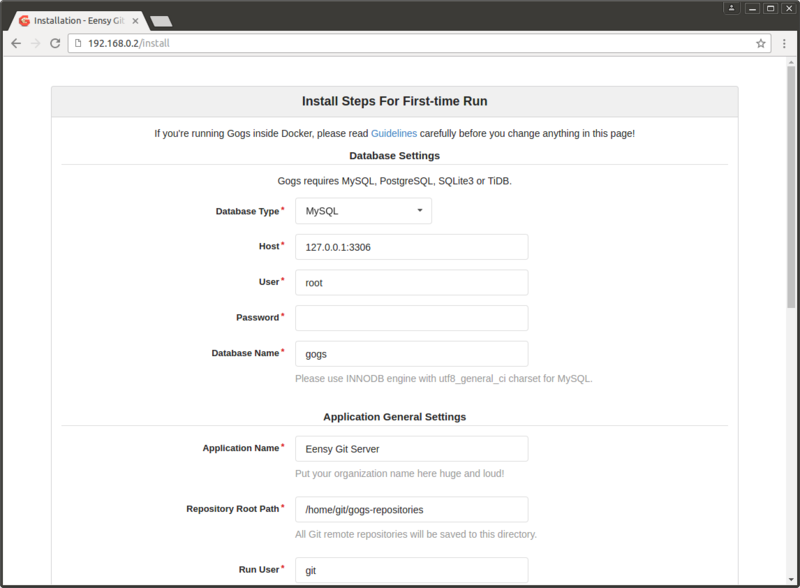

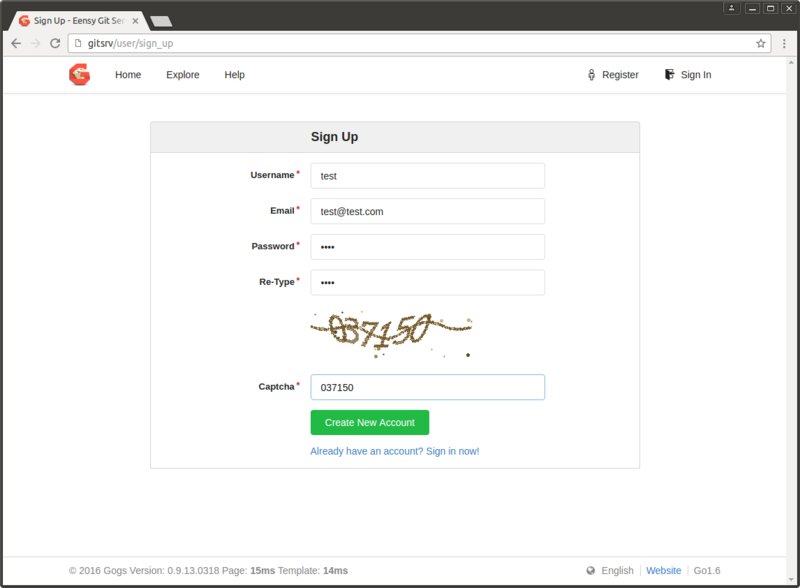
Click Install Gogs to complete the setup. Once setup as been completed, register as a new user. The first user registered will automatically become an administrator.

Once logged in you'll be sitting at the Gogs dashboard.
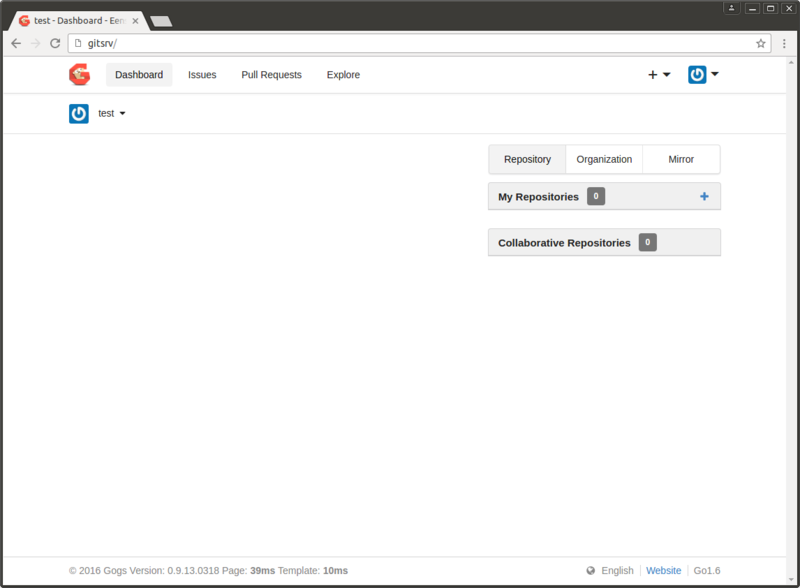
Now, you can add a repository, checkout the Admin Panel, and more.
Additional Setup and Configuration
Change the Default Password
Once you've got the install up and running, it is recommended to login as the git user and change the password. The default credentials are user git and password eensy that can be used to SSH into the device or to login through the serial console. Once logged in, you can change the password by running:
$ passwd
Set a Static IP Address
If your network does not have a DHCP server, or you want the device itself to use a static IP address, here's how to configure it.
Edit /etc/network/interfaces
sudo nano /etc/network/interfaces
and replace
auto eth0
iface eth0 inet dhcp
    wait-delay 15
    hostname gitsrv
with something like the following, replacing the appropriate network values.
auto eth0
iface eth0 inet static
    address 10.0.0.100
    netmask 255.255.255.0
    gateway 10.0.0.1
Save, and restart the network interface.
sudo ifdown eth0
sudo ifup eth0
Customize Gogs Configuration
By default, all data is stored at /home/git/gogs-data/. However, if a USB drive is inserted before initial Gogs setup, it will put all data at /media/usb0/gogs-data/.
The Gogs configuration file is located at /home/git/gogs-data/conf/app.ini. If you need to do manual configuration to the Gogs config file, you can use emacs or nano.
nano /home/git/gogs-data/conf/app.ini
Migrate Existing Repositories into Eensy
First, login to Gogs and get an application key under your profile settings.
Here's a script to migrate a bunch of existing repositories to a new Gogs installation. Just organize all of your repositories, bare or not, into a single directory all with a .git extension. Then, run this script passing the path to the directory. This script does not work for all cases, so verify what actually gets pushed.
./migrate.sh /path/to/repos
It will go through each repo, clone it locally, create the repository in Gogs through the API, and mirror it to the new repo created. Don't run this in the same $PWD as the source repositories.
#!/bin/sh

set -e

app_token=YOUR_GOGS_APP_TOKEN
username=YOUR_GOGS_USERNAME

for repo in $1/*.git
do
    echo Looking at $repo

    filename=$(basename "$repo")
    repo_base="${filename%.*}"

    if [ ! -d $repo_base ]
    then
    git clone $repo

    cd $repo_base

    curl -H "Content-Type: application/json" \
         -H "Authorization: token $app_token" \
         -X POST -d "{ \"name\": \"$repo_base\", \"private\": true }" \
         http://gitsrv/api/v1/user/repos

    git remote add gitsrv git@gitsrv:$username/$filename
    git push gitsrv --mirror

    cd -
    fi
done
Building Eensy from Source
Building Eensy from source is useful if you want to install new packages or change system configuration at build time. It requires a Linux machine and some time. Familiarity with Linux and buildroot are required.
Eensy is based on buildroot. In fact, buildroot does most of the work. Currently, Eensy uses the BR2_EXTERNAL feature of buildroot which allows configs, packages, and more to reside out of the buildroot tree, but act completely like they are naturally a part of buildroot. It's a pretty cool feature. To build the releases from source, you need a clone of Eensy and a clone of buildroot. It doesn't matter where you clone things to, but for these instructions they will be side by side in the filesystem.
git clone https://github.com/digitalpeer/eensy.git
git clone https://github.com/digitalpeer/buildroot.git
cd buildroot
# where DEFCONFIG is one of the defconfig file names in eensy/configs/
make BR2_EXTERNAL=../eensy DEFCONFIG
# optionally configure more options as necessary
make menuconfig
make
Now, if you look in output/images you'll see an sdcard.img that you can dd directly to a uSD/SD card. Also note that the default configs download all files to ~dl/ to keep them all in one spot.